
What it is
Carry goods from town to town for profit, rob the caravans that do, or guard them. From level 20 you can take one of three jobs:
| Job | You… | You earn from… | Join at |
|---|---|---|---|
| Trader | buy goods in one town and walk them to another on a pack animal | the price difference: the longer and more dangerous the road, the better | Dva, Ardeca |
| Hunter | ride with traders and fight off thieves and bandits | a share of the trader's profit + the weekly hunters' pool | Leonhart, Ardeca |
| Thief | bring down caravans, take their goods and sell them in the Thieves' Den | the Den sale + the weekly thieves' pool | Pasher, Ardeca |
Joining costs a fee that grows with your level, and you can hold one job at a time. Every job NPC has a "How does it work?" answer that explains the rules in the game; press See more in the conversation for that NPC's whole guide. New players: Arenar's guide quest in Ardeca points you to the three job boards, and the job NPCs show a "!" when they have a quest for you.
The Trade button and the trade windows
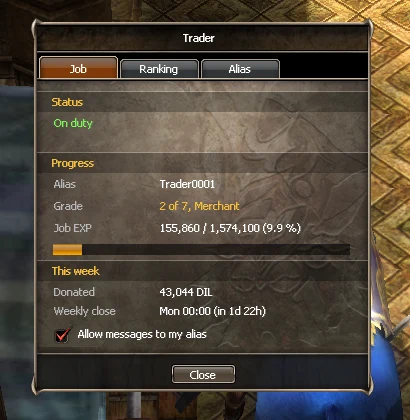
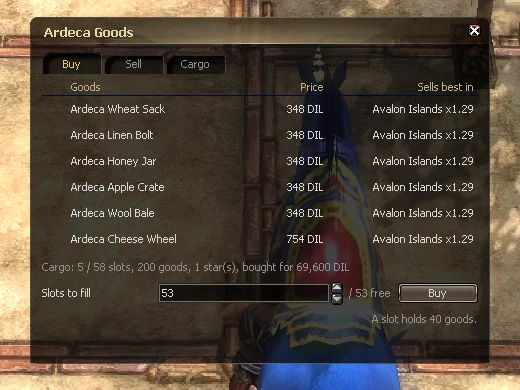
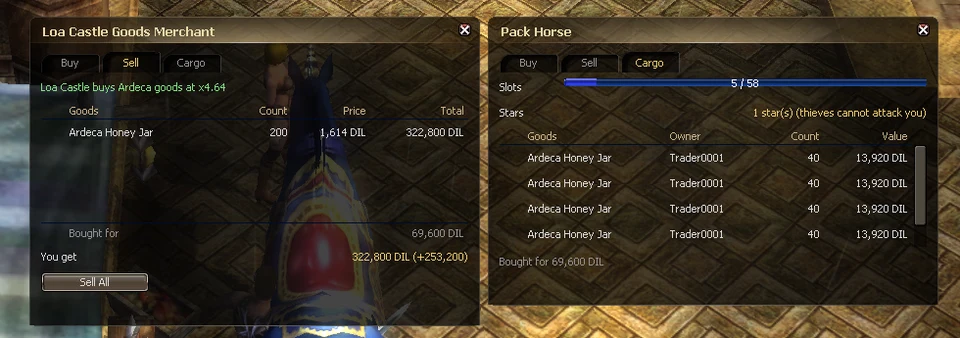
The Trade button on the main bar opens your job window, in the game's own window style, with tabs:
- Job: whether you're on duty (and what to do if not), your alias, your grade and its title, the job EXP bar, this week's standing and the next weekly close. The Allow messages to my alias box decides whether other players can message your job alias;
- Rankings: the best traders, hunters and thieves, with your own place at the bottom;
- Outcome (hunters and thieves): what you earned when the week closed, with Collect;
- Alias: type a new alias (3-12 letters or digits) and press Change alias; it asks first and shows the fee (the fee grows with your level; the first change is free).
Every "are you sure?" opens the game's own message box, and every amount the game's Split Stack window.
At a goods trader the buy window lists that town's goods with their live price: pick a good, set the amount, Buy. At the selling end the sell window shows what each stack is worth there (with Sell All). The cargo window shows what your animal carries, how much room is left and what you paid. Open Sell my goods and Show my cargo from the goods trader and both windows stay open side by side; click one to bring it to the front. Point at a goods row to see where the goods come from, what they cost there, their best market and what their home town buys them back for. Selling goods in their own home town asks first: home only buys them back for about half. Carry them to another town.
The windows are part of the game: they are always on, with nothing to switch (the launcher installs and repairs them itself). If they ever fail to load, the Trade button says so in chat ("The game UI failed to load. Please restart the launcher (it repairs its files).") and shows your job, alias, grade and the next weekly close there; you can still join a job and change your alias at Dva, Leonhart and Pasher, and the goods trader's menu buys in fixed lots (one slot, five slots, or fill up).
The loop
Trader
- Join at Dva in Ardeca. The guild gives you a job alias (change it any time in the job window or at Dva).
- Put on your job suit. You are on duty only while you wear it (dressing takes a short moment).
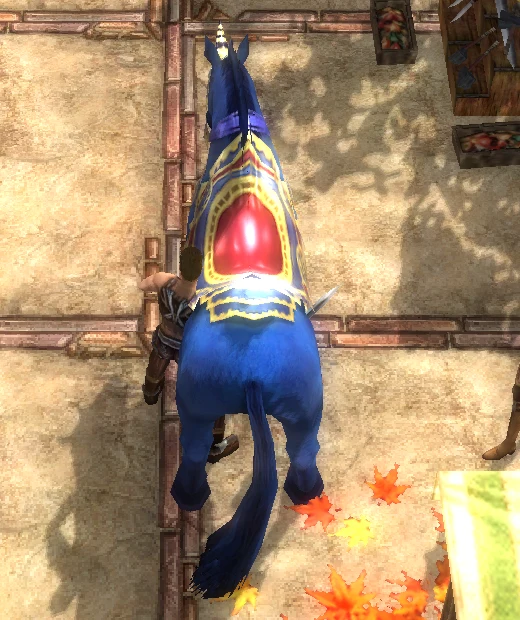
- Buy a Pack Horse Scroll or Pack Camel Scroll at a stable and use it to call the animal. A camel carries more but walks slower; the higher your level, the more it carries, and the scroll costs more. Use the scroll again to send the animal back to the stable. It walks after you, round buildings and walls, and never jumps to your side. You can ride your mount while it is out.
- Buy the town's goods from its goods trader. They are loaded onto the animal, not into your bag.
- Walk to another trade town. No teleports, return scrolls or town gates while you carry goods, and you can't go more than 100 cells away from your pack animal.
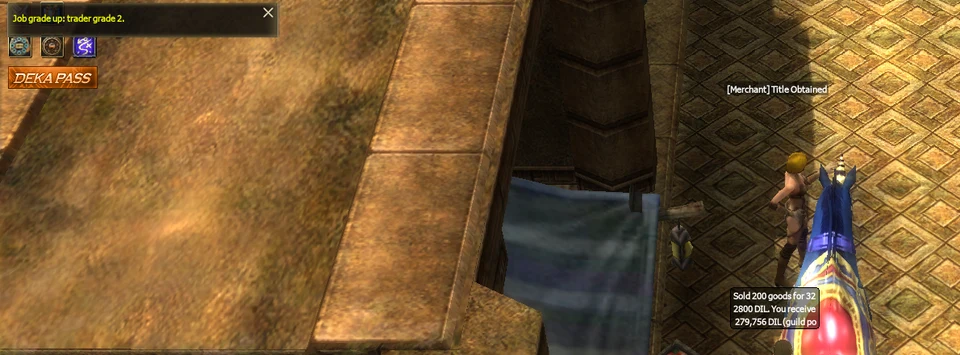
- Sell to that town's goods trader. Hunters in your party share in the profit; you get job EXP. Your animal stays with you for the next run: it is lost only if it is killed.
Thief
- Join at Pasher in Ardeca, put on the thief's suit, and get a pack animal (any stable, the Den's included; you can't call it inside a town).
- Find a loaded caravan on a PvP field and bring down the pack animal (or its trader). The goods fall to the ground.
- Load the goods onto your own animal and take them to the Thieves' Den (below).
- Sell them to Bella (Middleman) in the Den.
Hunter
- Join at Leonhart in Ardeca and put on the suit.
- Join a trader's party while you're both on duty and stay close.
- Fight off thieves and bandits on the way. When the trader sells, you get your share.
The Roads of Haran: tutorials, contracts and the story
- Tutorials: each job has a three-step tutorial that ends with real work on the roads: a first sale, a first escort or a first robbery. The trader's first run is one paid round trip, Ardeca → Deneb (Asray) and back to Arenar in Ardeca, once per character; after that Deneb buys only at the shop price, so trade on the real routes, starting with Ardeca → Parca Temple (Assam).
- Route quests: Dva has a quest for each trade road, from Ardeca → Parca Temple up to the castle roads. Each quest card lists the road map by map: the PvP fields, the safe stops, the stables, the exits and ships.
- Contracts: a daily and a weekly contract per job, for job EXP and travel supplies. Only real trades, escorts and robberies count; where no real target is around, beating off the NPC bandits counts slowly instead.
- "The Roads of Haran": a story in five chapters, one task per job in each, played out on the real roads. Chapters 3 and 5 give job titles (Licensed Merchant, Thief-Taker, Desert Thief; Silk Road Captain, Warden of Revenge, Pirate of the Crevasse).
- The job boards are with Dva (traders), Leonhart (hunters) and Pasher (thieves).
The towns, stables and roads
Every trade road crosses at least one open PvP field: that's where caravans get attacked. At the road forks on Heihaff, the Crevasse of Revenge and the Avalon Islands, and at the entry to the Draco Desert, a signpost tells you where each exit or ship leads, which goods trader buys there and from which level.
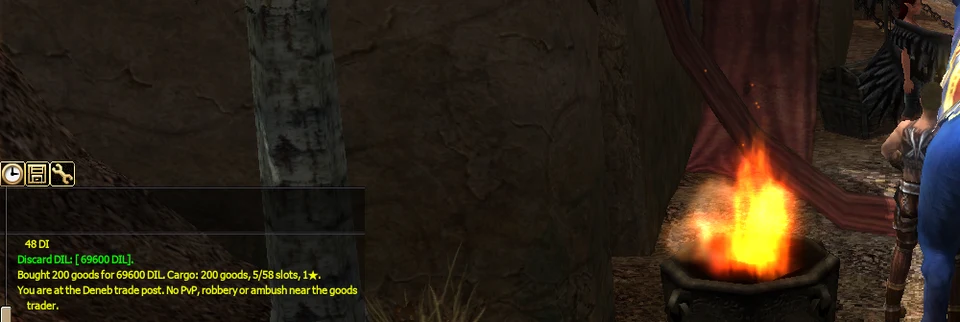
Deneb and Parca Temple stand on PvP maps, but the goods trader and stable there sit in a small safe trade post: no PvP, robbery or ambush inside it, and a green line tells you when you enter and leave.
| Town | Goods trader + stable | Note |
|---|---|---|
| Ardeca | Arenar | the start town; the three job guilds |
| Deneb | Asray | |
| Parca Temple | Assam | |
| Valley Rift | Luna | on foot from Ardeca through Heihaff and Crespo |
| Dravice Village | Lina | on foot from Valley Rift |
| Avalon Islands | Road-Lion | the end of the long desert road |
| Port Velaris | Erin | the harbour town (below) |
| Braiken Castle | Alice | castle trade, for the highest-level traders |
| Loa Castle | Audrey | castle trade, for the highest-level traders |
| the Thieves' Den | Volken (stable); Bella buys stolen goods | thieves only |
The ten stables (Pack Horse Scroll and Pack Camel Scroll): Arenar (Ardeca), Asray (Deneb), Assam (Parca Temple), Luna (Valley Rift), Lina (Dravice Village), Alice (Braiken Castle), Audrey (Loa Castle), Road-Lion (Avalon Islands), Erin (Port Velaris) and Volken (the Den).
The farther and more dangerous the road, the better the price where the goods are wanted. A town that gets flooded with one good pays less for it until its market recovers.
Port Velaris: a harbour town open to everyone. Take the boat from the iceboats on the shore of the Crevasse of Revenge; the Boatman at the port's west pier takes you back. Erin runs the general store, the trade goods and the stable; Stash keeps your storage.
The desert road: the road from the Crevasse of Revenge through Norak Cave, the Draco Desert and Requies Beach to the Avalon Islands goes both ways. Halfway, the Draco Desert rest camp is safe: no PvP damage, robbery or bandit ambush inside it. Kerin (general store and potions), Axion (the smith: weapons and upgrades) and Basil (storage) wait by the camp fire.
The Thieves' Den: a hidden bandit camp where thieves sell stolen goods. Only a thief wearing the thief's suit gets in:
- on foot through its gate deep in the Draco Desert, with the loaded pack animal (the Den Lookout beside the gate explains who may pass);
- with a Den scroll (it takes you there a few minutes after you read it);
- or ask Pasher in Ardeca to take you.
Bella (Middleman) buys the stolen goods (the Den pays less than the market), the Meister Merchant sells the thief's suits, The Den Board shows the week's best thieves, Volken keeps the stable, and the Den Guide by the arrival walks you back to Pasher in Ardeca.
The rules
- On duty = wearing your suit. Off duty you are a normal player, and none of the job rules apply to you.
- Take your suit off for events and bosses with friends: on duty you can only party with players on duty.
- Better suits need a higher level and job grade.
- You can't dress or undress while in a party.
- Players with a criminal record can't wear a suit.
- Who fights whom (on duty, on PvP fields):
- traders and hunters are allies;
- thieves are the foes of both;
- job foes show up as purple to each other, and these fights count as war: no criminal points, no PK count.
- A trader with a small one-star load is left alone by thieves (and can't attack them).
- Bandits ambush on the PvP fields, but never near the town merchants or inside the Draco rest camp. The bigger the load, the bigger the band:
- bandits go for the trader and the pack animal, the way the old Silk Road caravans were raided. Fight them off and your goods are safe; leave the animal unguarded and they can kill it, and the goods are lost. The more dangerous the band, the faster that happens;
- NPC hunters go after thieves who carry loot.
- Losing the goods:
- The animal is killed: the goods fall where it stood, and the animal is gone (call a new one with a new scroll). New traders (grade 1-2) lose only half their goods when robbed: the rest stays on the animal.
- You are killed on a PvP field carrying goods: they fall too. Logging out keeps your cargo, unless you log out in a fight (hit by a player in the last minute, or bandits on you): then it drops where your animal stands.
- Thieves can carry dropped goods off. You can load your own back if you're quick, before they vanish. A player who picks up your dropped goods can be put on the Bounty Board (Leonhart, Ardeca) for 72 hours.
- Channels: you can't change channel while your animal carries goods.
- Your animal is kept after a delivery: it is lost only if it is killed.
- Stay with your animal: while it carries goods you can't go more than 100 cells away from it. It walks after you, round buildings and walls, and never jumps to your side. If it finds no way to you for 10 seconds, you are free until it reaches you. Dashes and party recalls are refused while it carries goods, and so are dungeons, the Colosseum and Battle Royale.
- Dying on duty to a job foe or a bandit costs some job EXP. You never lose your grade, an item or your good name.
- Parties on duty are only with players on duty: traders and hunters together, thieves only with thieves.
- Leaving a job:
- take the suit off and send the animal away first;
- hunters and thieves wait seven days before joining any guild again;
- a weekly share that is waiting is paid out first.
Grades, titles and the week
- Job EXP comes from:
- sales (traders);
- escorting and fighting (hunters);
- Den sales and fights (thieves);
- tutorials, contracts and the story quests.
- Grades and titles: job EXP raises your grade from 1 to 7, and each grade gives a title (from *Trade Beginner* to *Great Merchant*, *Thief Beginner* to *Great Thief*, *Hunter Beginner* to *Great Guardian*). Higher grades open better suits.
- The trading week closes every Monday:
- the best traders, hunters and thieves are ranked (the job window's Rankings, or ask your job NPC);
- traders have no pool of their own: their donation to the guild is ranked (see the rankings at Dva);
- part of every trader's profit fills the hunters' pool and part of every Den sale fills the thieves' pool; each pool is shared out by what each player did. Collect your share in the job window's Outcome tab (or at Leonhart for hunters, Bella for thieves).
The Bounty Board
If a player kills you in open PvP, or picks up the goods your pack animal dropped, you can put DIL on their head. Anyone who then defeats that player in open PvP collects it. No new gold appears: a bounty is paid from the poster's own DIL.
- Posting: talk to Leonhart (Hunter Guild, Ardeca) and choose "Post a bounty". You can only post on someone who killed you or robbed your cargo, within 72 hours of it happening.
- A bounty has a minimum that grows with the target's level, and the guild keeps a 10 % fee on top.
- A bounty that nobody claims runs out after 7 days: the DIL comes back by mail, but the fee does not.
- If a thief robbed you, the board shows the thief's job alias, never their character name.
- Claiming: defeat the target in open PvP. Arena, war and duel kills never pay.
- You can't claim your own bounty, or one on a friend: the poster, the target's party, guild and alliance, and anyone linked to the target's account recently are refused.
- One kill pays only up to a cap; the rest stays on the head for the next hunter. The same killer can claim the same target once every 24 hours, and a target who was just claimed is safe for 10 minutes.
- A target more than 20 levels below you pays nothing. An on-duty Hunter who claims also gets job EXP.
- Finding the target: the board lists the target, level, the pot, why, and the last PvP map they were seen on (updated every few minutes). If you are a target you will see "There is a bounty on your head".